Struggling with getting wide-diameter arrows to shoot well? Liam Grimwood looks at what you can try
In the last few years there have been some big developments in indoor compound shafts. It is widely accepted that to give yourself the best possible head start with the small 10 indoors you need to use the maximum diameter arrow shaft allowed in competition, which under World Archery rules is 9.3mm, meaning your only option was a 23 diameter shaft.
A 2315 or 2314 was not too difficult to tune, providing you had a long draw length and were shooting 60lbs. I never had too much of an issue getting a 2315 aluminium arrow to shoot well, but for people at lighter weights or shorter draw lengths it could be a difficult task. To weaken the arrow you typically have two choices: either lengthen the shaft, or increase the point weight. Lengthening the shaft too much made the aluminiums very susceptible to bending, especially in hard straw targets, and the heavy points could prove very slow and unforgiving. Easton then developed the 2311, which made getting a large diameter arrow easier to tune for those shorter draw length or lighter poundage shooters. However, many people found that the issue with the 2311 was that the wall was fairly thin, and didn’t tend to last long without bending or weakening, especially when shot into straw.
As I have mentioned in previous articles, I have had some great results from shooting aluminium 2315s over the past 10 years so carbon indoor arrows never really seemed attractive to me, but last year I started experimenting with them for the first time. I decided to try the Carbon Express X-Busters out for indoors based on the success I had seen Martin Damsbo and Dietmar Trillus have with them. The great thing about the X-Busters is that they are all maximum diameter (or extremely close to) but they come in a number of different spines so they can be suitable for shooters of all draw weights and lengths. I selected the 350 spine as it was closest to that of a 2315 aluminium arrow, and started from there. They were matched that closely to a 2315 that I ended up opting for exactly the same length and point weight to my 2315 setup. This was 30.5 inches long with a 200-grain point. The paper tune and arrow flight was equally as good as my aluminium’s straight away.
Over the course of the 2012/2013 indoor season, my average FITA 18 score rose by about three points, which was quite a big step indoors, so I could conclude the arrows were definitely working for me. I also experimented with some different point weights. The X-Buster comes with a standard 120-grain pin point, and then you can screw weights into the back of the point to adjust the point weight. This adjustment can be done from the nock end with a special allen wrench so you don’t need to keep removing and inserting the points, which is a great feature. After quite a bit of testing I found that the 65-grain insert gave me the most forgiving setup.
So all in all on a performance basis I feel the X-Busters have given me a slight edge over the aluminium shaft, but this could simply be down to me shooting slightly better, or the change in point weight giving a little more forgiveness. But this is not the best feature of these arrows; for me, the greatest feature is their durability. Many of the smaller UK-based FITA 18 tournaments still shoot at straw targets, as do a number of clubs at regular shooting sessions, and I found shooting aluminium arrows into a straw target almost always results in bent shafts. During the course of a season I would need around 24 aluminium arrows due to the fact that shooting three arrows into a new straw boss for the weekend would mean they would all have slight, or sometimes major, bends. Unless an indoor arrow is deadly straight, it just won’t perform well and at best will be less forgiving, and at worst will be completely inaccurate. What I noticed was that you can shoot the carbon arrows into a straw target all weekend and at the end of that take them home, spin them, and they would still be perfectly straight. This is so true that I shot the same three arrows all season last year, and the only thing I changed was the nocks.
Lots of shooters in the UK also enjoy shooting Portsmouth rounds, and many local tournaments feature this round. In many cases, these can be single-spot faces which could mean devastation for your arrows, but the X-Busters also have the nock collars on the back of the arrow to protect the shaft in case of a rear-end impact.
I was amazed at how well the arrows maintained their straightness, even on the most punishing of hard targets, and ultimately I think that is what will make the difference for most shooters. It just gives you one less thing to worry about as you won’t need to spin your arrows every end to try and see if any are losing straightness.
Tips and Troubleshooting
How do you find the correct point weight?
It’s important to remember that an arrow that is slightly too stiff will perform a lot better than an arrow which is slightly too weak, so I would always keep that in mind. Obviously optimum spine will give you the best performance, so that is what you will strive for. The magic formula I have found is that a 30-inch arrow at 55lbs with a 200-grain point works well for me as a starting point. From there it is really a case of trial and error. I will shoot a number of rounds and record scores, changing just one thing at a time. The more arrows you shoot, the more accurate your data will be.
Try to shoot at least 100 shots with a particular setup, and from that work out your average arrow value (for example, for 100 arrows the maximum score is 1,000, my score was 989, so my average would be 9.89.) Then change just one thing on your setup, such as trying a point 20 grains lighter, then do another 100 arrows. If you put enough time into this you will find the most forgiving setup. The more shots you do with each setup the more accurate your data will be. However, remember to only change one thing at a time. I always stick with my arrow around 30 inches and then experiment with point weight to get it perfect. This is also a more cost effective option, as you can’t add length back on once you’ve cut them.
Should you use arrow wraps?
Arrow wraps have been something I have tried from time to time; they do not have a negative effect on your performance but they do not have a positive one either. I also test lots of fletching combinations, and I’ve found that if I’m in the middle of testing, wraps are one more step in a process that’s already time consuming, so I don’t usually bother. However, if you like the look of them then go for it!
Fletchings or feathers for indoors?
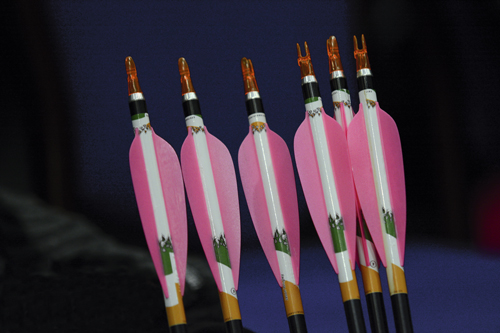
This is all a question of arrow clearance. If a feather impacts a part of your rest, riser or cables as it leaves it will have a very minor effect on where the arrow lands, but if a solid fletching makes an impact with any of these on the way through you can get some very negative results. The best way to test for clearance is to get some spray-on powder (you can get this from most chemists), spray your entire shaft and fletchings, and then shoot it. You will be able to see the exact points of contact with the bow and the arrow as the powder will only be rubbed off in the places it has touched. If your clearance is good, in that the fletchings have no contact, then I would recommend a plastic fletching as it is much lower maintenance than a feather. Feathers don’t tend to last long and can be a bit inconsistent, so you will need to go through them and pick the good ones. But if you do have an issue with your fletchings making contact with the bow, feathers will give significantly greater performance. The two different vanes will give different tunes from your bow so make sure you paper test both to check the flight as well. Experience tells me that feathers tend work better for most people, but you need to keep them in good condition and look after them.


