
Dr James Park calculates the optimal draw force line
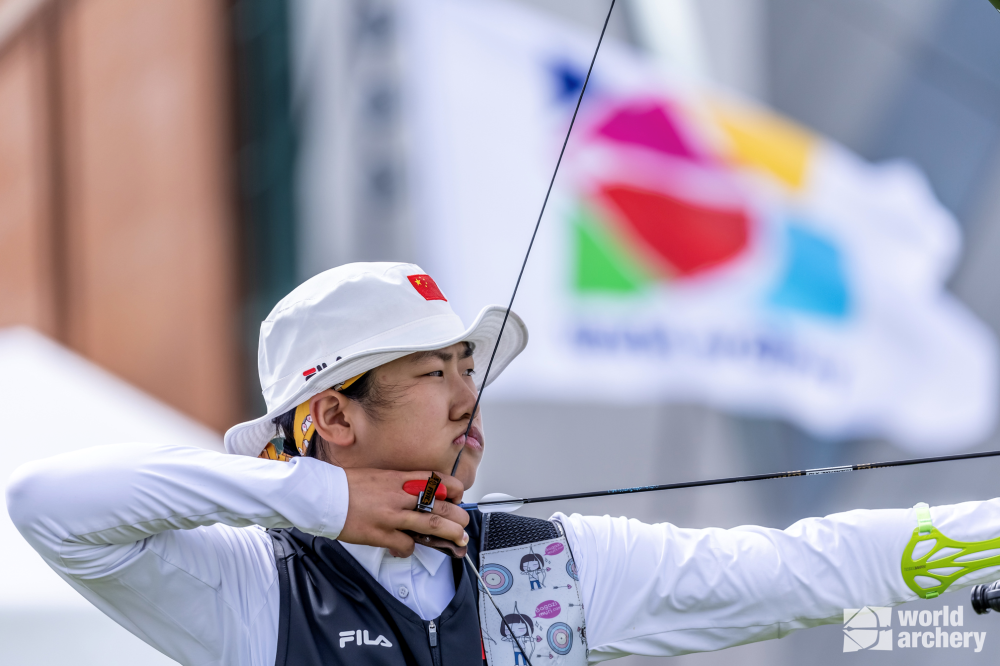
There are a few modern tools available to coaches and archers, video analysis being one of the most commonly used. We take another look at Archery Biomechanics App, this time at the drawing arm elbow position. Remember, knowledge is power, but you still have to do a lot of work.
Whilst it is a reasonably simple mechanical system, understanding and optimising the bow and arrow can be quite complex mathematically, and may be intractable for non-engineers; try reading one of the excellent journal papers written by Bob Kooi, for example. Analysis very quickly involves second or fourth order partial differential equations with non-linear coefficients and difficult boundary conditions.
On the other hand, the archer is simpler. As an engineer, I treat the archer as an interconnected 3D system of bones, plus the relevant muscles. Analysis and optimisation of this system are then reasonably simple 3D geometry problems. To assist in my analysis of the archer, I have modelled the bone structure in an application. I have modelled my own bone structure, using either a recurve or a compound bow, shooting distances between 10 and 90 m and at targets at various heights. The archer is shown from both the side and from above. I am able to move any of the joint positions and study the various forces on different parts of the body.
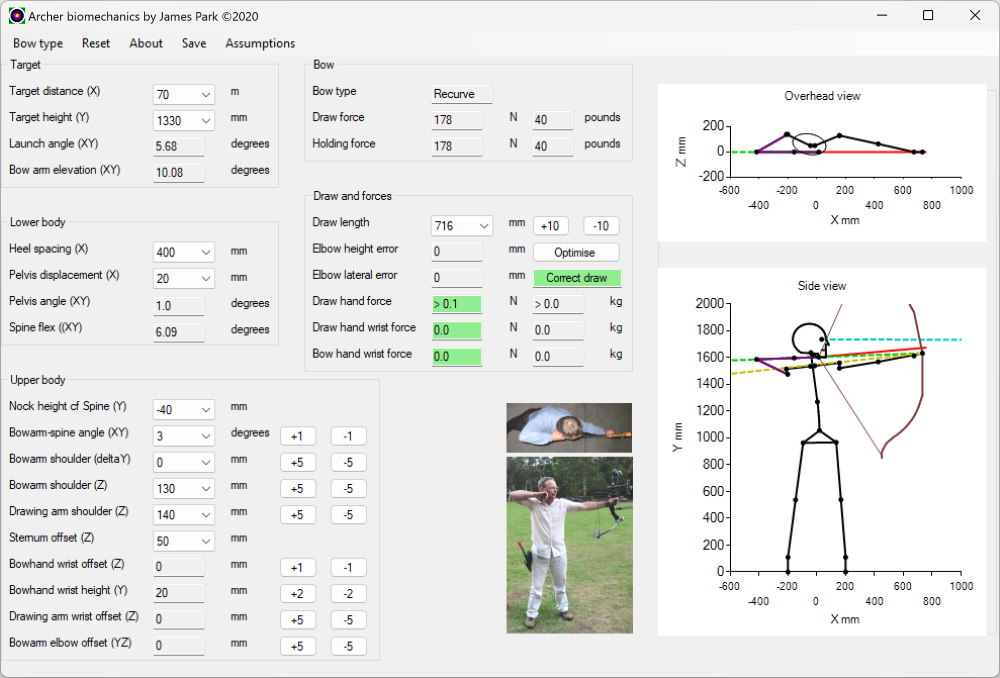
The line of force is a line between the position of the archer’s bowhand on the bow and the position where the archer is holding the string – for a recurve bow I use the position of the middle finger. Note that, as seen from the side, the line of force is not along the line of the arrow. As seen from above, the line of force is aligned with the arrow. On my application, it is shown as a dotted light green line. The arrow is shown as a red line. I can tell the application to optimise the draw length so that the drawing arm elbow is on the line of force.
If the archer’s drawing arm elbow joint is on the line of force, the archer does not need to use any force from the biceps or triceps muscles of the drawing arm – all the effort required on the drawing arm side to hold the bow at full draw will be provided by the large back muscles. Note that in this position the archer’s drawing arm forearm will not be aligned with the arrow – the elbow joint will be a little above the arrow line.
However, if the drawing arm elbow is not on the line of force, the archer must then use either the biceps or triceps muscle to hold it in place. Importantly, that would be using the muscle in a very weak position as the arm is fully flexed, so it will be very tiring and not steady.
For example, if the archer is under drawn (which is very common for a recurver) and the elbow joint is on the line of force as seen from the side, but out from the line of force as seen from above, the archer must be using the drawing arm biceps muscle to hold the string in position – the force from the bow will be trying to pull the drawing hand out from the archer’s face. Any variation in the release will then widen the archer’s group on the target.
It is quite straightforward to calculate the side force on the archer’s drawing hand for an incorrect position of the drawing arm elbow joint (and it is done in my application). For example, for me with a holding force of 40 pounds and a bow arm elbow lateral error of 37 mm (not very much), the side force on my drawing arm hand will be about 3 kg. Try holding a 3 kg weight in your drawing hand with your drawing arm in its usual position and see how quickly you tire! However, I see many recurve archers with their drawing arm elbow joint at least that far out of line.
For most archers, getting the drawing arm elbow joint on the line of force will result in the string being a little along the side of the archer’s jaw, not on the front of the jaw – and you can see that in the screenshot, where the draw length is set correctly.
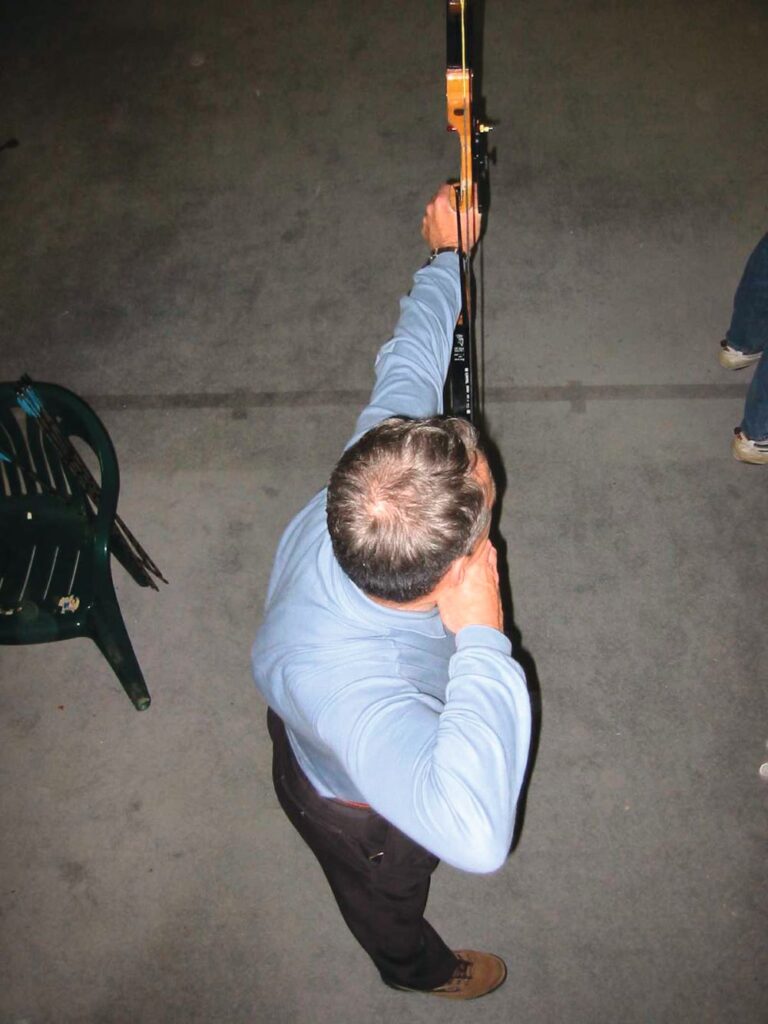
Note that a small change in the lateral position of the drawing arm shoulder joint changes the position of the drawing arm elbow in relation to the line of force and hence means a lateral force on the drawing hand. For example, moving that shoulder joint laterally by 20 mm without changing the draw length results in a 2.4 kg side force on the archer’s drawing hand. This points to the need for the archer to be very careful to get the shoulder joints in the exact same position from shot to shot and to select the drawing hand position that places the drawing arm elbow joint on the line of force. This can be assessed by taking a photograph of the archer from both the side and from overhead and drawing the line of force on the photograph. A small difficulty is knowing exactly where the elbow joint is located, as it is inside the archer’s arm.
Another error made by archers using both bow types is flexing the drawing arm wrist joint and the drawing hand metacarpophalangeal joint (the joint in the fingers at the end of the palm). In both cases the flexor muscles in the drawing arm must do some work. For example, if the wrist joint is 20 mm off the line of force, the side force on the hand with a drawing force of 40 pounds will be about 1 .1 kg (also calculated in my application). Again, try holding that weight using the wrist flexor muscles – it is quickly tiring. Any variation in the release will widen the archer’s group on the target. Again, I see many archers making this error.
“AN EASY WAY TO DETERMINE IF THE ARCHER IS FLEXING THE WRIST JOINT IS TO WATCH THE WRIST IMMEDIATELY FOLLOWING RELEASE.”
This points to the archer needing to take care to keep the wrist joint and the finger joint straight, from the start of the draw through to the release. In particular, the archer must not try to assist the use of the clicker by flexing the wrist or fingers – doing so is very tiring and very inaccurate.
An easy way to determine if the archer is flexing the wrist joint is to watch the wrist immediately following release – if it is under tension at full draw, the angle of the drawing hand relative to the forearm will change immediately after release.
Overall, any misalignment results in high lateral forces on the archer’s bow hand and wrist and can seriously degrade the archer’s score. When I am watching an archer using a recurve bow, I am wanting to see the drawing arm elbow joint on the line of force, the drawing arm wrist straight and the joint where the drawing arm fingers join the palm straight. Interestingly, I only see that for top-level archers.
If you would like to try Archery Biomechanics App, it is available for a nominal fee from Urban Archery and runs under Windows: https://www.urbanarcherysupplies.com/.