
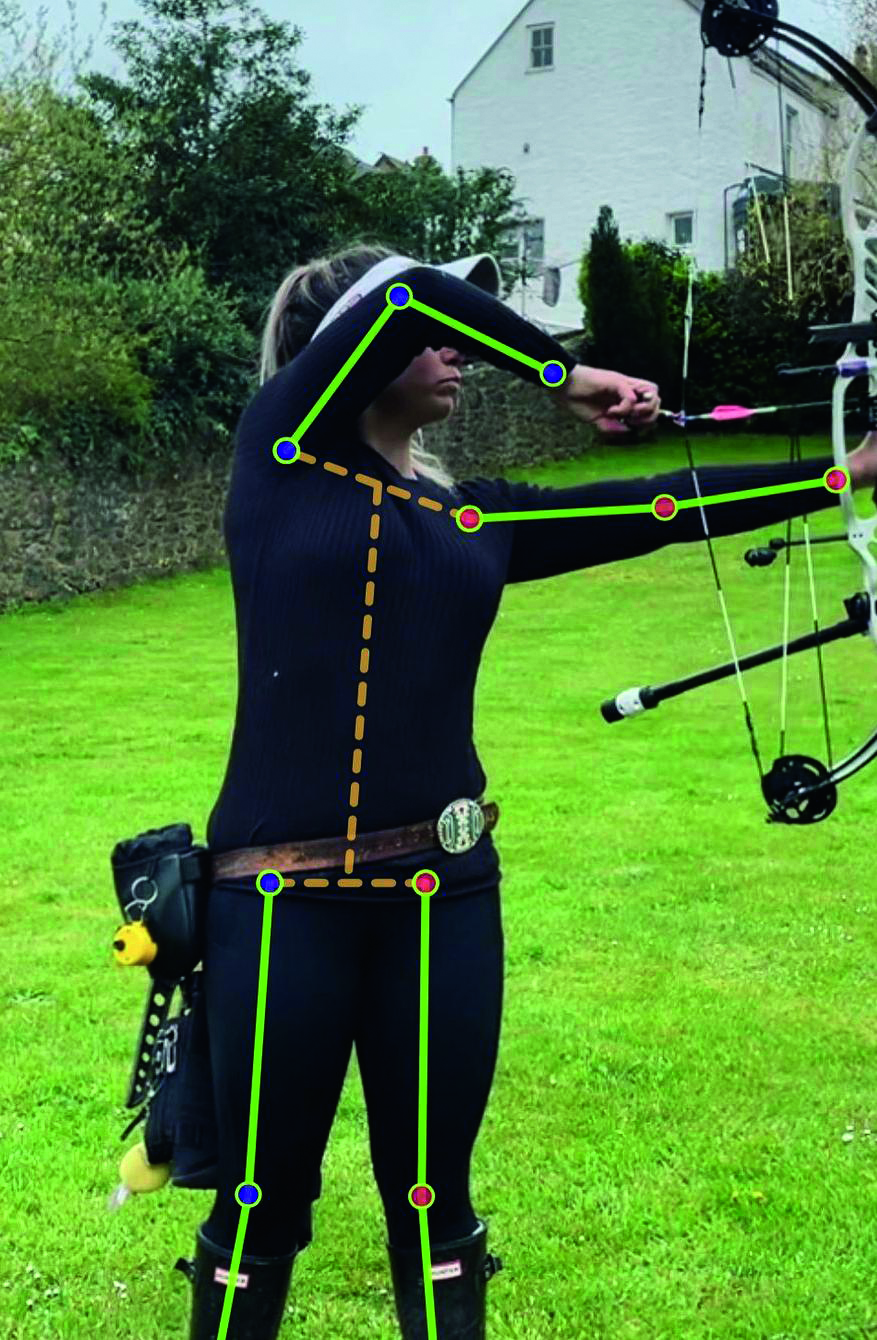
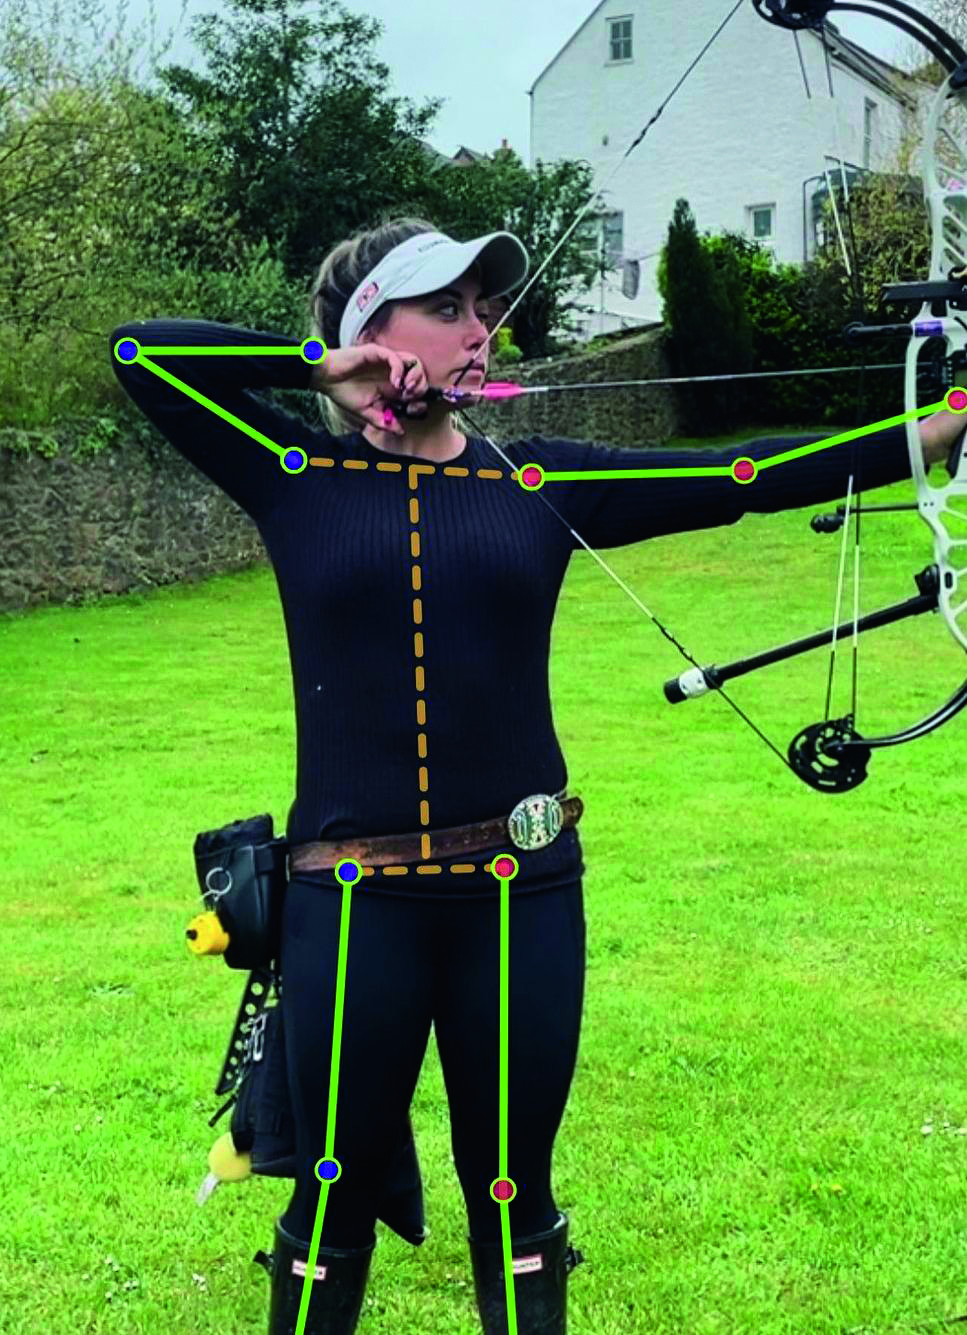
Duncan Busby gives expert guidance on how to find a “perfect” compound bow arm
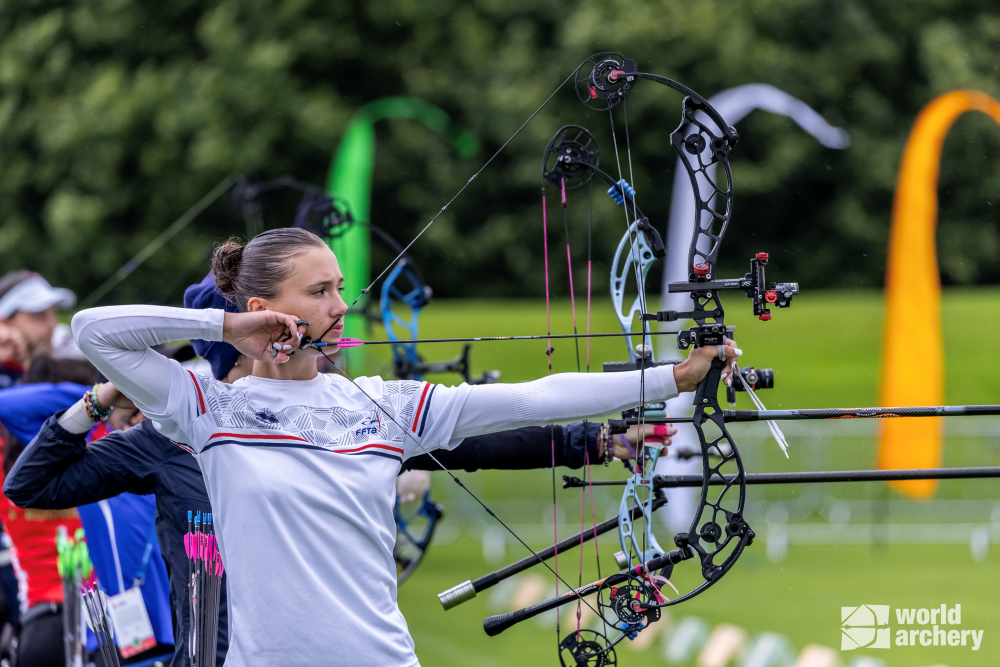
Since its introduction in the 1960’s, the compound bow has been constantly evolving. It’s not just bow design and technology that have moved on, compound shooting technique has also progressed. Technique that was once common practice is now considered to be bad form and is viewed as counterproductive to shooting well with today’s equipment; how we shoot today is a result of those compound bow design advancements. The evolution in shooting form is evident in the position of the archer’s bow arm, straight or with a bent – how you position your arm could have an enormous effect on your results. So, which way is right?
The History
Years ago, the majority of compound bows featured round wheels instead of cams, and there was no definable stop to the bows draw cycle. The advice was to shoot the bow from the middle of the valley, the part of the draw cycle between the point of let-off and what passed as a back wall. Depending on the cam or wheel design, the valley could be quite long, upwards of half an inch or more. Archer’s technique needed to accommodate for this and the easiest way to shoot was with a fairly pronounced bend in your bow arm. This gave you some play in your draw length and helped you find a perfect point in the valley to shoot from. Not every compound archer adopted this bent-arm technique, but it was a lot more common to see archers shooting with, what would now be considered, a pronounced bend in their arm.
As cam technology advanced valleys got shorter, stops got harder and draw length became more of a set measurement. Shooting the bow from the wall of the cam became standard practice and shooting form was adapted to it. Because the new cam systems were a lot more aggressive and pulled against you at full-draw, archers who maintained a bend in their arm found that their aiming patterns could become unstable. Shooting with a straight arm gained popularity as the number one solution to this problem.
Modern Shooting Form
Today, the guiding principle in archery is to use more bone than muscle to support the bow; a straight arm is stronger and more consistent when anchored against the cam stop. You will be steadier and will not fatigue as quickly, because the forces developed by the bow are transferred onto your skeleton. Try doing a push up, for example. You will find that your frame can hold your position for longer when your arms are fully extended, and not when they are bent. Simply put, your muscles will be under less strain from the forces exerted onto them.
A straight arm is much more effective when shooting under pressure. It is more difficult to execute fine muscle movements with nerves, so the less reliance you have on your muscles to create stability, the more consistent your shot will be.
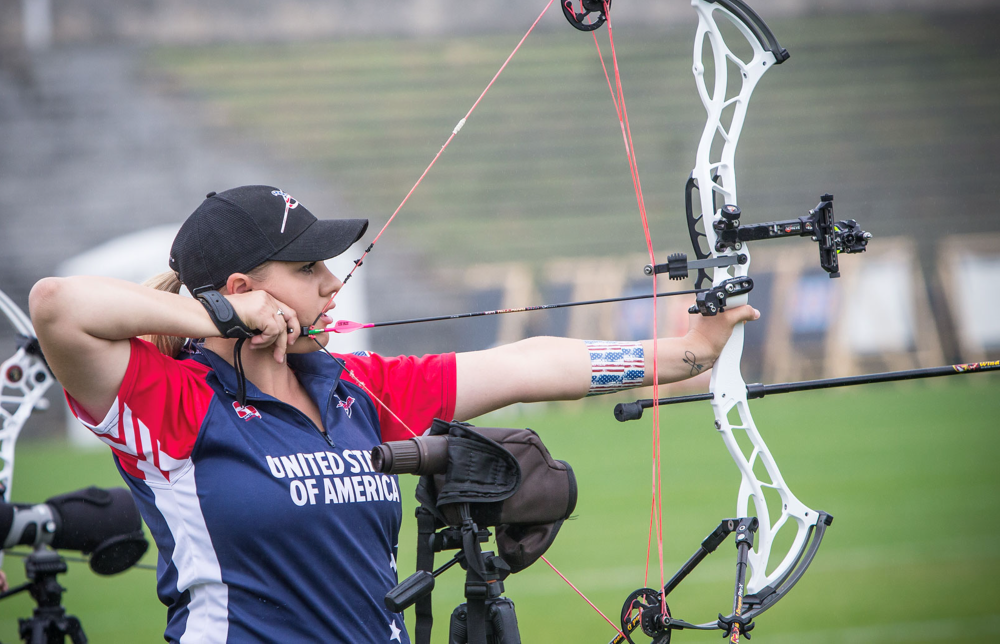
However, it is important not to hyperextend or lock-out your arm, as this can pull your bone alignment out of its ideal position, leading to fatigue. Additionally, this increases the risk of injury to the joints in your arm and shoulder and can create string contact with your bow arm. Hyperextending your bow arm limits the amount of push you can effectively put into the bow; you need some amount of expansion during shot execution to activate your release aid. But if your arm is fully extended, you may find it difficult to hold your aim and execute shots consistently.
So, how much give should you have in your bow arm? Today, many Pros compete with a ‘soft’ bow arm; that is a relaxed arm position. Adding any amount of tension can massively impact your results, as World Champion Levi Morgan worked out during a particularly difficult tournament: “I just told myself, dude, relax!”, not thinking about what affect that would have on my shooting, as I meant it more for my anxiety than my aiming. However, when I said that, I felt my bow arm muscles relax, and my pin instantly stopped moving. The shot fired, and the arrow hit the middle of the target and I didn’t miss the rest of the day.”
The guiding principle of biomechanics is to use only the muscles necessary for the action, so, by allowing your arm to sit in its most natural state without excess tension, you will find it’s better able to bear the force of the draw and mass weight of the bow, while providing much of the direction for the shot.
A good biomechanical technique will create consistency and endurance, but it must be acknowledged that not every top compound archer will use this method. Some notable names shoot with a bent elbow and engage their muscles during the shot process. As compound archery is less about physical power and more about shooting accuracy, shooters can get away with an unorthodox bow arm position and other variances in their technique, more so than in recurve archery. Some archers find that a slight bend in their arm can steady their aim, especially those that shoot with a lot of pressure on the back wall of the cam, as this gives them more room to expand during the shot. However, this will require more physical strength and many more hours of training to maintain consistency. If the degree of bend in your arm changes at all through fatigue or lack of muscle memory, your reference point will likely be affected, and your results will suffer. Additionally, as your bone alignment is imperfect, you are more likely to compensate for instability by incorrectly loading your shoulder joint, so focus can be diverted away from aiming and onto your muscle control instead, simply to maintain consistency.
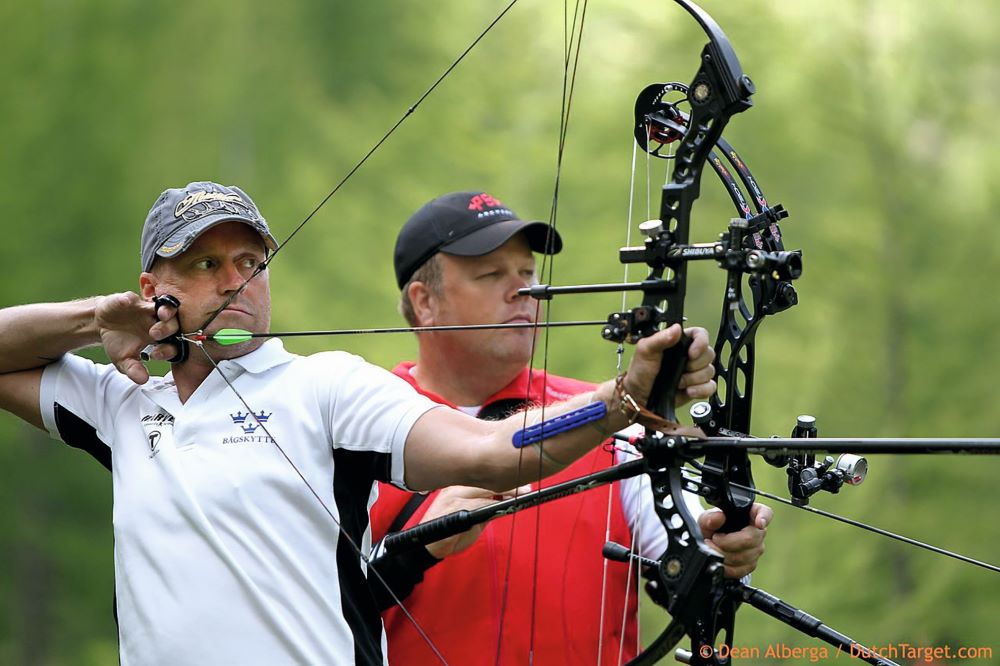
But each compound archer’s unique body shape, structure or disability can make it difficult to apply the same biomechanical principles across an entire shooting field. You should identify and recognise your own specific requirements and strengths before you commit to what is considered to be the optimum shooting position. Although a straight but relaxed bow arm is today considered to be the correct way to shoot there is scope for diversity. Though you are unlikely to see the extreme bent arms of yesteryear, a little variety is not a bad thing, and, ultimately, finding a bow arm position that allows you to comfortably shoot well, time and time again, is the most important basis of a good technique.
“You should identify and recognise your own specific requirements and strengths before you commit to what is considered to be the optimum shooting position.”
Coaches Perspective
Over the years, I have seen many injuries in archers who tried to force themselves into what is considered to be a textbook shooting position. Though the principles of shooting an arrow apply to both compound and recurve archery, elements of what is largely seen as a recurve shooting process, have to be modified to compensate for the lower brace heights and high let-off cams of compound archery.
Outward rotation of the elbow is believed to be safer and is considered to give more support for the bow’s forces, rather than simply locking or bending your arm. But as a coach I am not an advocate of insisting that all archers follow this particular technique; some do not find that this position comes naturally (myself included). I would always advise that you allow your elbow to sit in whatever position feels most comfortable, as long as you are putting no strain on the joint, and it does not have to support the full force of the shot.
Over rotation of the shoulder to force your arm into a textbook position should, likewise, be avoided, as this can lead to rotator cuff injuries. When raising the bow, you should ensure that your shoulder does not rise up with your bow arm, though you should not force it down into an unnaturally low position. You can avoid damage to the shoulder joint tendons by maintaining a neutral shoulder position, and by allowing your arm to sit in its most natural state; this will allow you to engage your shoulder correctly at full draw.
In young archers, continual compressive forces on the bow arm can generate bone end loadings, leading to permanent deformity in their growing bones. These bone-spurs and other stress-related injuries to the joints are often caused by incorrect joint loading during the drawing process. Overloading the arm with high draw and mass weight can cause permanent damage; this injury can be avoided with the adoption of a straight, relaxed position and a sensible approach to poundage and the overall weight of the set up.
Key elements to achieve a good bow arm position
I would advise all archers to set their draw position before shooting their bow, as this will form the foundation for a safe draw and stable bow arm. When raising your bow to the target ensure that the shoulder remains in a neutral position, remembering not to force it down. Draw back the string and keep forward pressure on your bow to resist the weight of the draw; your arm may feel a little hyper extended, but this is normal. Here, focus on your core stability and your pectoral muscles as an aid to maintain this position. Your bow arm should mimic the same natural appearance of simply leaning against a wall with your palm flat against it; twisting or contorting your arm into any other position can lead to discomfort, instability and, ultimately, injury.
Once you are at full draw keep some pressure on the wall of the cam as you lower your bow towards the target; you should try to draw your bow from a slightly raised position, to help prevent your front shoulder from rising up during the draw process. When your sight drops into the gold, your arm should still be straight, but the muscle tension needed to draw the bow, should now have been transferred to your back with your shoulder sitting in a natural, low position.
Your arm should be relaxed and ready to resist the increased back tension now being applied. If you cannot effectively pull through the shot using your back muscles and your release is taking too long, then it is likely that your bow arm is not providing enough resistance to the forces you’re exerting on it due to hyper-extension; you made need to consider shortening your draw length a small amount.
If, on the other hand, you need to bend your elbow or force your shoulder back, then it is likely that you are putting too much pressure on your front arm, rather than keeping it relaxed. Your back half should be doing most of the work, with your bow arm simply resisting the pressure of the shot, so a small increase in draw length may be necessary.
Upon release your bow arm should move forward towards the target in a straight line as the tension in your body is released. Try not to allow your arm to drop or swing off to the sides, as this can negatively impact your results; the forward motion and final position of your arm should be as natural as possible.