Compound archery techniques are forever developing; what were once common practices 10 or 20 years ago are now thought to be counterproductive or even damaging to your shooting. Among other changes a conscious release has been eliminated from compound teachings, and since many of these changes are due to advancements in equipment, techniques are continuing to evolve and adapt as we find the most efficient methods to shoot the latest in compound bow designs.
One of the most obvious changes in compound technique is the position of your bow arm. Many years ago, when the majority of compound bows used round wheels instead of the modern cam systems we have today, archers had no definable stop to pull to. Past teachings advised you to shoot these early bows from the middle of the valley (this is somewhere between the bow’s let-off and the back wall of the wheel).
Depending on the bow’s draw cycle, this could be quite long – anything up to an inch or more – so an archer’s technique needed to accommodate this. The easiest way to do this was to shoot with a fairly pronounced bend in your bow arm so you could adapt your draw length to suit your bow’s optimum release position. As advancements in cam technology were made draw cycles became more efficient; valleys got shorter and stops became harder. Shooting form evolved around these advancements and archers were taught to shoot these new bows from the back wall of the cam, and as a result draw length became a set measurement and shooting with a straight bow arm became the most popular method of shooting a modern compound bow.
The science behind shooting with a straight arm
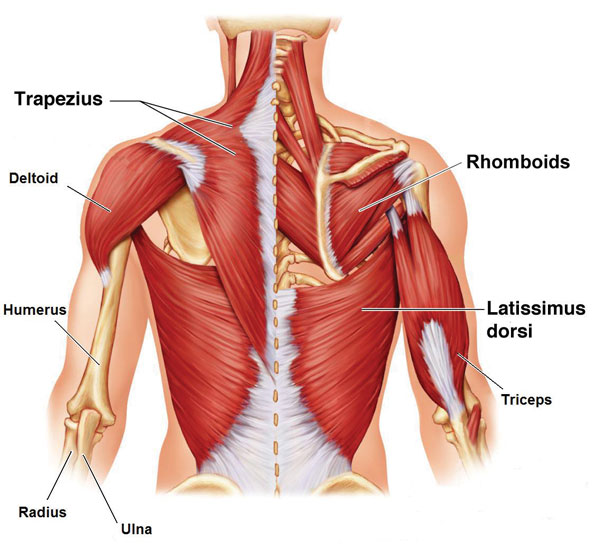
The primary muscles and bones used to lift and draw the bow, and the ‘back tension’ muscles used to pull through the shot
Advancements in bio-mechanics and the understanding of compound shooting form have also played a part in the changes made to the position of the bow arm. Your bow arm provides much of the direction for the shot and takes the force of the draw as well as the weight of the bow. As a result, shooting with correct bone alignment and a balanced muscle load is known to have a direct and positive effect on your score.
Your arm is made up of three bones; the ulna and the radius in your forearm and the humerus in your upper arm, which attaches to the shoulder blade (scapula) as a ball and socket and allows your arm to move and rotate. During the shot process these bones should be straight and in alignment with each other; directing the forces of the shot straight through the centre of these bones and joints will reduce the need to use any muscle strength to keep your arm in position. As the principle of a good technique is to increase consistency and lessen the risk of injury, the position of your bow arm should maximise the use of your bone structure and minimise the need to use the muscles in your arm to control the shot.
Although your arm is controlled principally by two large muscles, the bicep and the tricep, it is the muscles in and around your shoulder joint and upper back that are critically important in supporting your bow arm. Correct and consistent back tension is an essential part of good bow arm form, and any archer using the muscles in their arm to control their shot may eventually find themselves suffering from fatigue and inconsistent results.
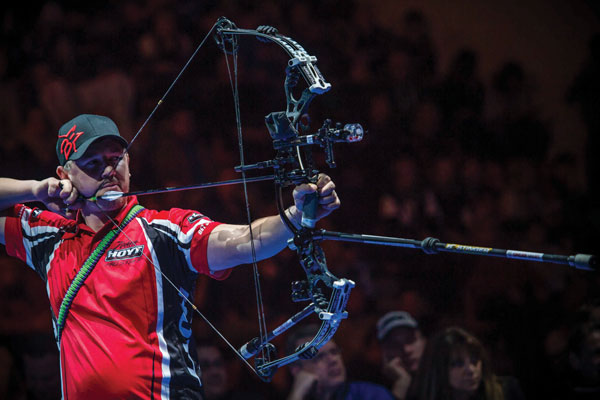
Though a straight arm is preferable, you should be careful not to lock your bow arm from your elbow as this will put enormous pressure on the joint. Hyper-extending your elbow disrupts the bone alignment between your forearm and upper arm. This not only affects your arrow flight by preventing you from executing a straight follow-through as you push the bow towards the target upon release, but it can also lead to injury.
Conversely, coaches may initially advise new archers to temporarily shoot with a slight bend in their arm to avoid injury from string contact; a straight but relaxed position will provide you with the greatest amount of string clearance while maintaining bow arm stability, so aim for a middle ground between these two positions.
Allow your elbow to sit in whatever position feels most comfortable, as long as you’re putting no strain on the joint
Outward rotation of the elbow is believed to be safer and is considered to give more support for the bow’s forces than simply locking or bending your arm. But, as a coach, I’m not an advocate of insisting that all archers follow this particular technique; some do not find that this position comes naturally, myself included. So I would always advise that you allow your elbow to sit in whatever position feels most comfortable, as long as you’re putting no strain on the joint and you do not have to support the force of the shot through your arm.
Over rotation of the shoulder in order to force your arm into a textbook position should be avoided as well, as this can lead to rotator cuff injuries. As the guiding principle of biomechanics is to use only the muscles necessary for the action, you can avoid damage to the tendons around your shoulder joint by maintaining a neutral shoulder position and allowing your arm to sit in its most natural state; this will also allow you to engage your shoulder correctly at full draw.
Continual compressive forces on the bow arm can generate bone end loadings, particularly in young archers, which can lead to permanent deformity in their growing bones. These bone spurs and other stress-related injuries to the joints, caused by vibration from fast bows and light arrows, can be avoided by not overloading the arm with the adoption of a straight but relaxed bow arm position.
How to shoot with a straight arm
The principles of shooting an arrow apply to both compound and recurve archery, but elements of what is largely seen as a recurve shooting process have to be modified to compensate for the low brace heights or high let-off cams of compound archery. As a result I have tailored this guide more towards compound shooters, but the biomechanical principles of the two disciplines should still remain the same.
I would advise all archers to set their draw position before shooting their bow, as this will form the foundation for a safe draw and stable bow arm; your bow should be held at waist height and your release aid attached to the string with your front shoulder set low.
Apply a small amount of pressure to the string and raise your bow to just above target height while maintaining this tension; remember, you should always draw your bow from a slightly above level position to prevent your front shoulder from rising up during the draw process.
Now, keeping your shoulder in a low position but without forcing it down, draw back the string and keep forward pressure on your bow to resist the weight of the draw. At this point your arm may feel a little hyper-extended but this is normal – instead focus on your core stability and your pectoral muscles as an aid to maintain this position. The position of your bow arm should mimic the same natural appearance of simply leaning against a wall with your palm flat against it; twisting or contorting your arm into any other position will only lead to discomfort and instability.
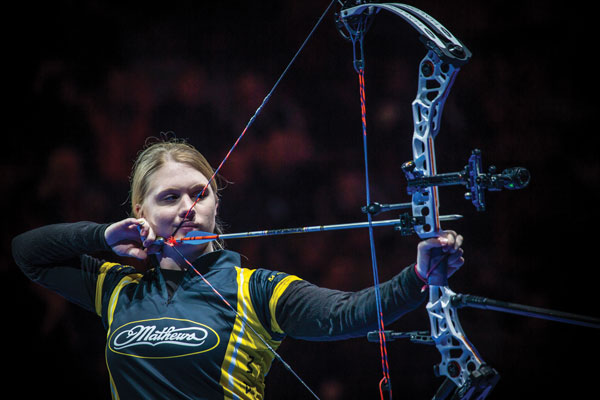
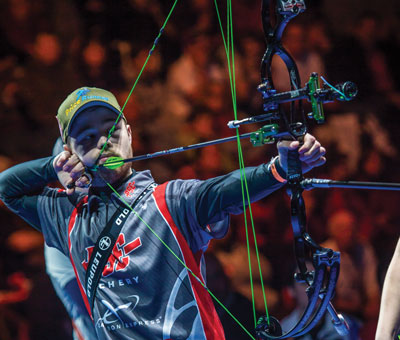
Some shooters find a small bend in their arm can steady their aim, though it requires more muscle strength
Once you are at full draw, keep some pressure on the wall of the cam as you lower your bow towards the target. When your sight drops into the gold, your arm should still be straight, but the muscle tension needed to draw the bow should now have been transferred to your back with your shoulder sitting in a natural, low position.
Your arm should be relaxed and ready to resist the increased back tension now being applied, but if you feel that you need to hyper-extend either your shoulder or elbow to be able to comfortably aim, then consider shortening your draw length a small amount. If you cannot effectively pull through the shot using your back muscles and your release is taking too long, then it is unlikely that your bow arm is providing enough resistance from the rear forces you are exerting on it.
But if, on the other hand, you need to bend your elbow or force your shoulder back, then it is likely that you are putting too much pressure on your front arm rather than keeping it relaxed, and a small increase in draw length may be necessary. Your back half should be doing most of the work, with your bow arm simply resisting the pressure of the shot.
Upon release your bow arm should move forward towards the target in a straight line as the tension in your body is released. Try not to allow your arm to drop or swing off to the sides as this can negatively impact your results; the forward motion and final position of your arm should be as natural as possible.
Is shooting with a straight arm important?
A good biomechanical technique will create consistency and endurance, but it has to be acknowledged that not every top compound archer will use this method. Some notable names shoot with a bent elbow and engage their biceps and triceps during the shot process, and although this is a valid argument in compound archery, the same cannot be said for recurve archers. The nature of the Olympic bow requires the archer to be stronger and more consistent in their technique since they cannot rely on the same advances in aiming and release aid technology that are uniquely available to compound archers.
As compound archery is less about physical power and more about shooting accuracy, shooters can get away with a poor bow arm position and other variances in their technique. Some archers find that a slight bend in their arm can steady their aim, especially those that shoot with a lot of pressure on the back wall of the cam, as this gives them more room to expand during the shot.
However, this will require more physical strength and many more hours of training to improve consistency. If the degree of bend in your arm changes at all through fatigue or lack of muscle memory, your reference point will likely be affected and your results will suffer. Additionally, as your bone alignment is imperfect you are more likely to compensate for instability by incorrectly loading your shoulder joint, so focus can be diverted away from aiming onto your muscle control instead, simply in order to maintain consistency.
Compound archery is less about physical power and more about shooting accuracy
But each individual compound archer’s unique body shape, structure or disability can make it difficult to apply the same biomechanical principles across an entire shooting field. So you should identify and recognise your own specific requirements and strengths before you commit to what is considered to be the optimum technique. Ideally, a good bow arm position should employ all the principles of biomechanics and establish a strong and efficient shot, but compromises can be made and this is demonstrated no better than by Matt Stutzman, who can out-shoot most able bodied archers using his feet.
A good biomechanical technique will give you consistency, strength and endurance, and although a straight but relaxed bow arm is today considered to be the correct way to shoot there is scope for adjustment. Though you are unlikely to see the extreme bent arms of yesteryear, a little variety is no bad thing, and, ultimately, finding a bow arm position that allows you to comfortably shoot well, time and time again, is the most important basis of a good technique.
This article originally appeared in the issue 116 of Bow International magazine. For more great content like this, subscribe today at our secure online store www.myfavouritemagazines.co.uk


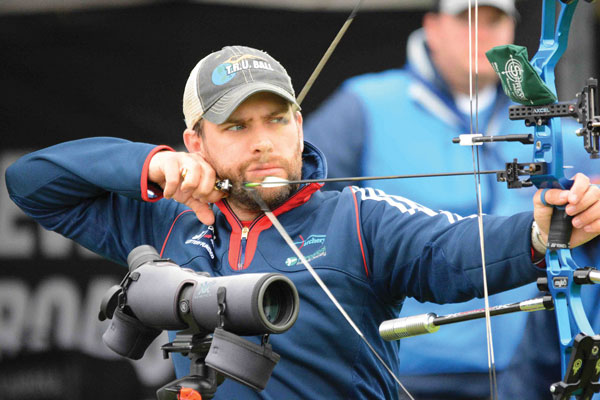
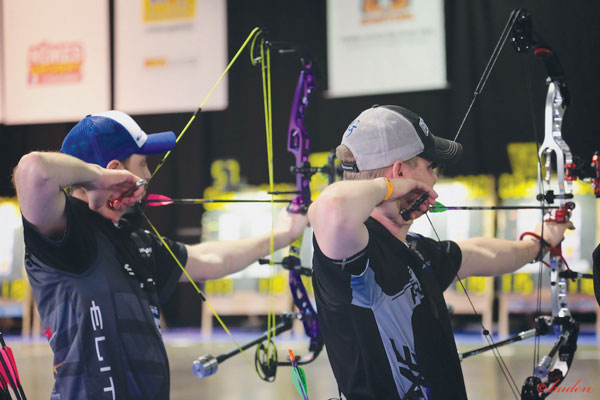
[…] Top Tips: Bow Arm Basics […]